Japanese embroidery sashiko is a traditional technique of embroidery, which is widespread in Japan since ancient times. Simple and beautiful technique of Japanese embroidery sashiko originated in the 16th century, about 500 years ago. The origin of this technique is unknown because it is found in different parts of Japan.
Nowadays, traditional Japanese sashiko embroidery is used in floral fabrics, pillows, bags, etc. In addition, the sashiko technique can be applied to quilts. This simple sashiko technique is also used as rehabilitation for the elderly.
Materials and tools needed.
The fabric that is suitable for Japanese sashiko embroidery is cotton with a dense texture with little tension. Traditionally, the main type of fabric was indigo cotton, but nowadays hemp, silk, wool and chemical fibers are also used depending on the application.
Important: coarser fabrics will be easier to sew for beginners
A long sashiko needle with a large eye is recommended.
Scissors, for cutting fabric and trimming threads.
Ruler, used for drawing pictures and building the cut of the fabric.
Circle for drawing curved lines.
Disappearing, water-soluble marker. Used when drawing directly onto fabric.
Parchment or tracing paper. Used when copying the pattern onto the fabric
Japanese sashiko embroidery stitch technique.
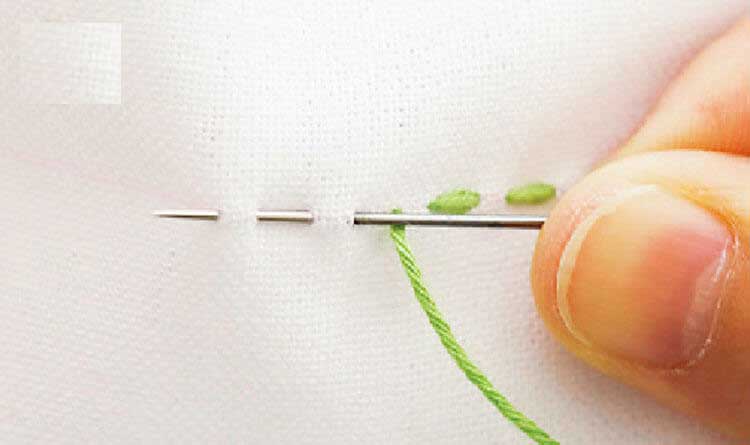
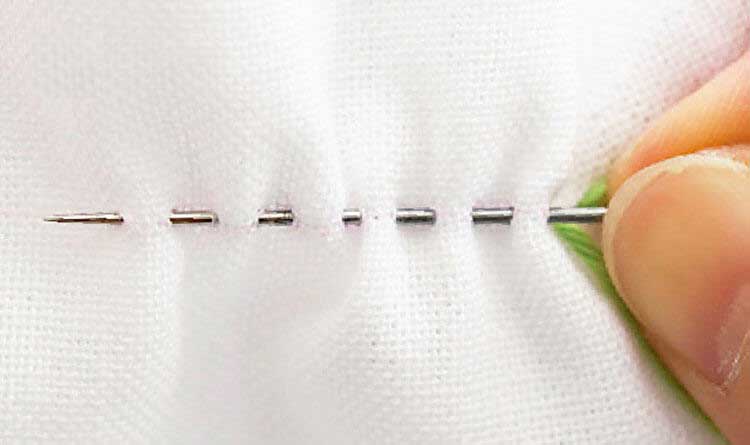
If the drawing with a straight line, it is better to dial as much fabric as possible on the needle and only then pull through the thread. In the case of a curved line, pull the needle every 2-3 stitches and pull through the thread.
Important: In case of embroidering a curved line, be careful as the fabric will stretch if it is compressed too much.
sewing technique-1
sewing technique 2
sewing technique 3
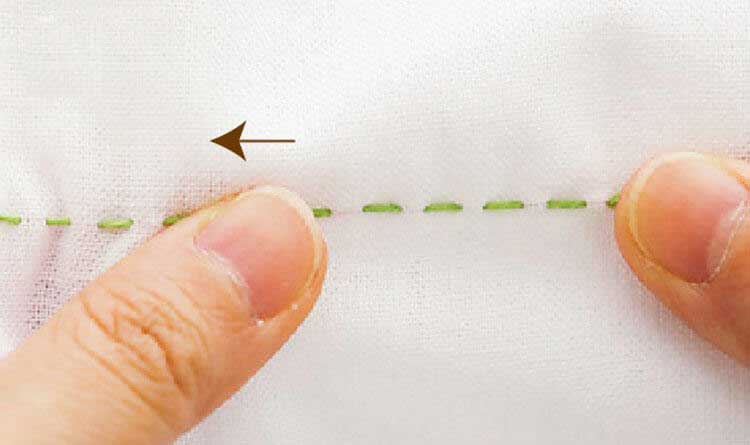
With the needle out, clamp the stitch with your finger and stretch the thread as if you were ironing it.
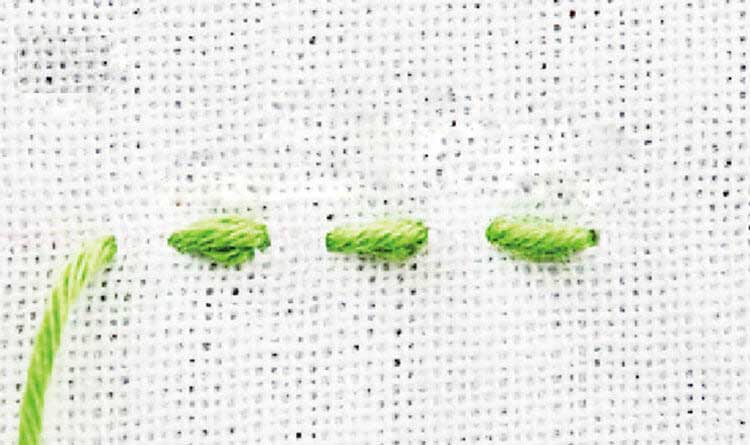
When embroidering the stitch, the ratio of the front and back thread should be 3/2.
You can tie a knot on the wrong side of the knot, but this shows how to gently secure the thread without making a knot.
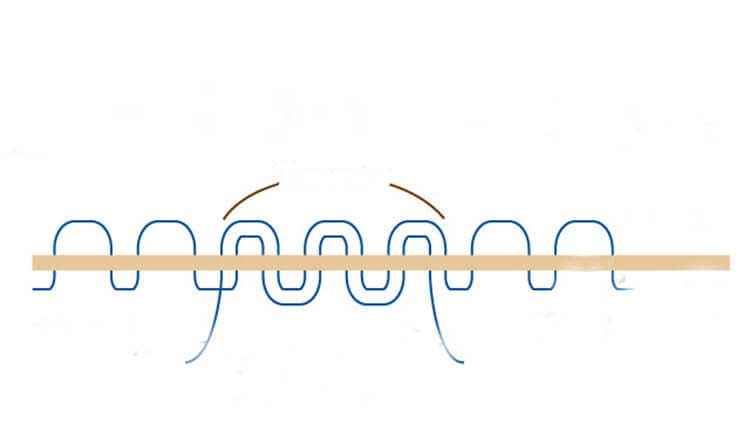
Securing the thread at the beginning
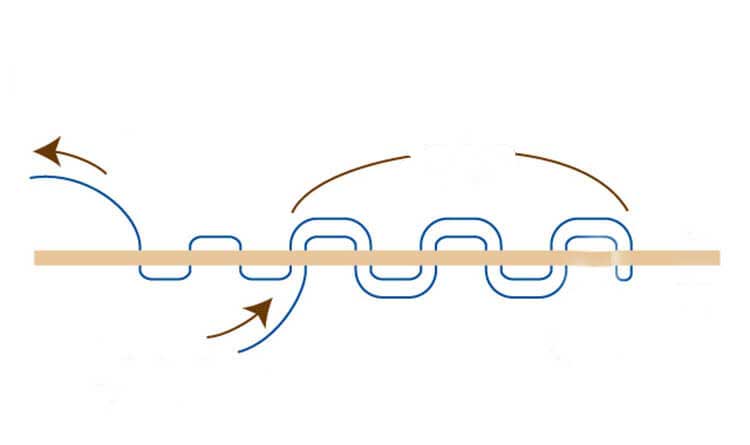
When you run out of one thread and start using another thread, sew 3 or 4 stitches extra when transitioning. When joining two threads, use the following pattern.
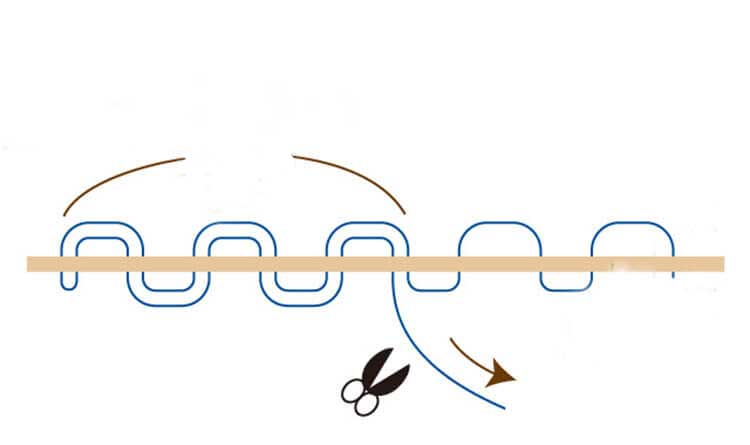
When securing the thread at the end, just like at the beginning, do 3 stitches extra in the opposite direction. Important: it is better to make the stitch size the same size. (Note that the fabric will shrink if you make the stitches too small)
Sashiko Japanese art of embroidery and beginners' mistakes
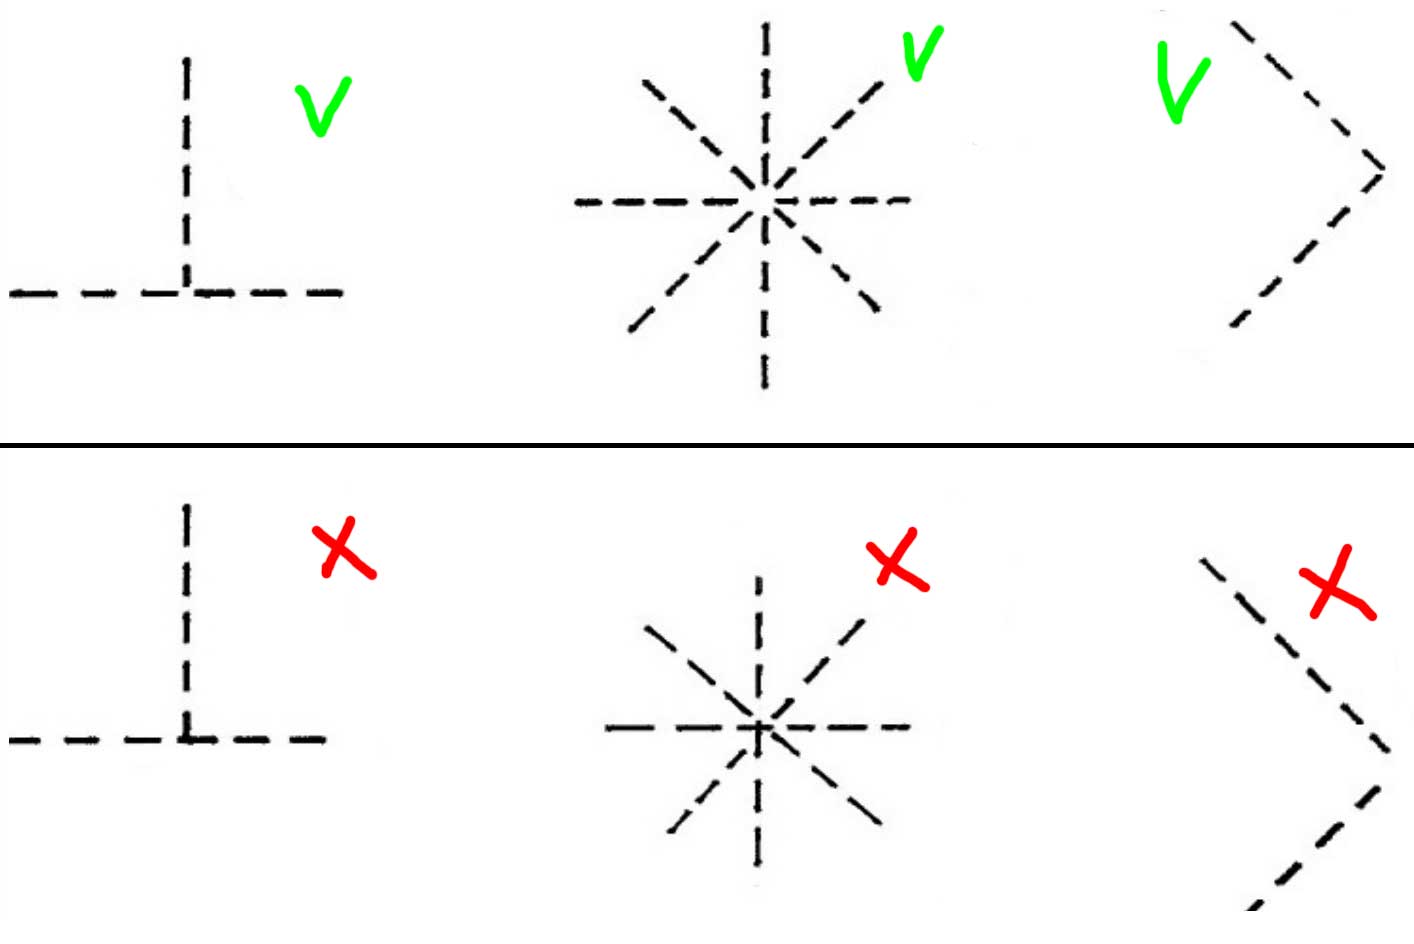
1. Make sure you are making the correct stitch in the corner. If you put the needle in the corner, the embroidery will look neat. Adjust the stitch length just before the corner.
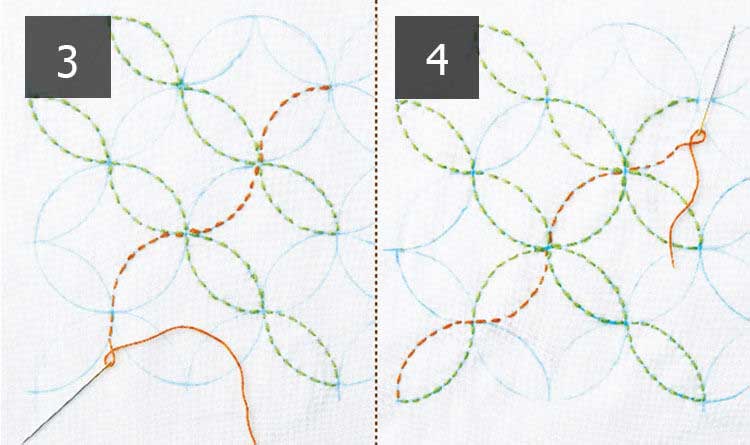
2. If the lines converge at one point, make sure the pattern is not broken.
3. If there is an intersection of the lines crosswise.
4. To keep the fabric from stretching in a certain direction, you follow the thread forward and then back.
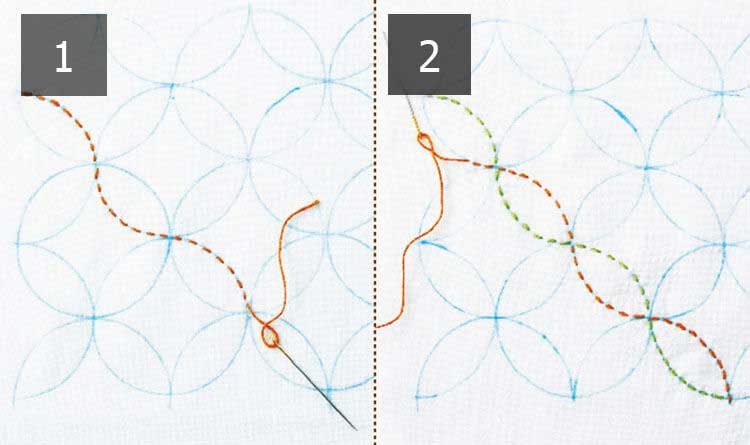
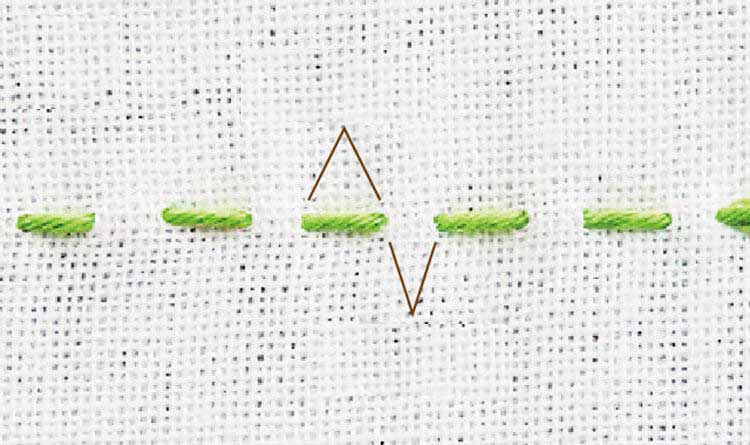
5. The green thread marks the part that is ready. The orange thread is the part we are embroidering now